
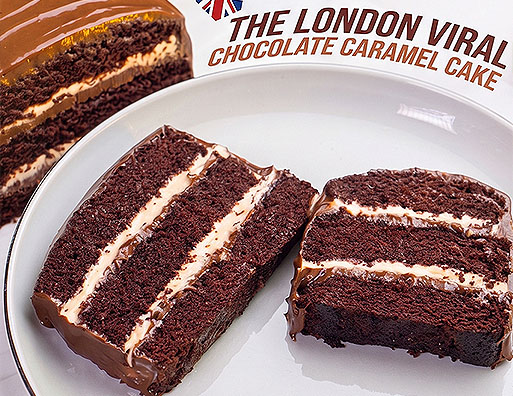
Ultimate Viral London Chocolate Caramel Cake
A rich chocolate sponge layered with whipped salted caramel ganache and silky chocolate ganache, inspired by the popular London bakery-style cake.
Looking for the viral London Chocolate Caramel Cake recipe? You’re in the right place!
I kept seeing this beautiful cake all over my social media. It’s covered in glossy chocolate ganache with thick, gooey layers of caramel tucked inside.
After seeing it so many times, honestly I couldn’t resist making my own homemade version. This recipe has everything that makes this cake so tempting.
It starts with a rich and moist chocolate sponge, filled with smooth white chocolate salted caramel. The whole cake is then covered with a rich chocolate ganache.
Ready to make this delicious cake at home? Grab your mixing bowls, and let’s get baking!
🏛️ The Backstory: Who Made This Viral London cake and Why Is It Called London’s Viral Cake?
British baker Edd Kimber, winner of the first series of The Great British Bake Off, created this chocolate caramel cake and featured it in his cookbook Chocolate Baking. He is also known as The Boy Who Bakes.
The cake later became popular at London’s Pophams Bakery, and then it became every customers favorite and was sold out within minutes. There were long queues and the high demand made it one of the most talked about chocolate cakes in London, and later it went viral online as the London chocolate caramel cake.
If you love comforting chocolate desserts, you might also enjoy our delicious Chocolate Tres Leches Cake.

So rich and chocolatey – You get a soft chocolate cake with a smooth salted caramel filling.
Soft and moist – Every bite is tender, and the cake stays delicious for days.
Looks beautiful – The layers and glossy chocolate topping make it look extra special.
Perfect for sharing – Make it for a weekend treat, a celebration, or when friends and family come over.
Easy to make – I’ll guide you through each step, from the cake to the caramel filling and chocolate ganache.
❤️ The Story Behind the Flavor
The moment when I decided to make this viral chocolate caramel cake, my kids were so excited and kept asking me to make it sooner . As soon as I started baking, they were right beside me in the kitchen, watching every step and asking me , “Moma Is it ready yet?”
I wanted to make the cake extra special, so I took my time with each an every part. I made a soft and rich chocolate sponge with melted dark chocolate and hot coffee for a deep chocolate flavor. Then I added a creamy white chocolate salted caramel ganache between the layers and a smooth chocolate ganache on top.
The hardest part for my kids was waiting for the ganaches to chill overnight. They kept asking when they could finally have a slice to eat!
The next day, when I cut the cake, their faces so happy when they saw the layers and caramel filling. They couldn’t wait to taste it. After the first bite, they both loved it and asked for more . Seeing how happy they were made all the time and effort in the kitchen completely worth it. It quickly became a cake they kept asking me to make again!
Get ready to make a rich and indulgent chocolate loaf cake with smooth chocolate ganache and light, whipped salted caramel ganache. Follow each step carefully, and you’ll have a beautiful cake with delicious layers of chocolate and caramel.
Phase 1: Prepare the Ganaches
Step 1: Make the Chocolate Ganache
Place the dark chocolate and milk chocolate in a heatproof bowl and melt them gently over a double boiler.Meanwhile, heat the whipping cream until it is hot, but do not let it boil.Slowly pour the hot cream into the melted chocolate while stirring continuously until everything is combined.Add butter and stir until it’s combined.

Step 2: Blend and Chill the Chocolate Ganache
Use an immersion blender to blend the ganache until it becomes completely smooth and glossy.Let it cool completely at room temperature. Cover the surface tightly with cling film and refrigerate overnight.
Kitchen Tip: If you need a savory break while preparing this cake, try making some golden, flaky Chicken Fatayer. They are perfect for a little kitchen break!

Step 3: Make the Caramel Base
Place the sugar in a pan and cook over medium heat until it melts and turns a rich medium-amber color , Add the butter and stir until it has completely melted and mixed into the caramel.Turn off the heat.

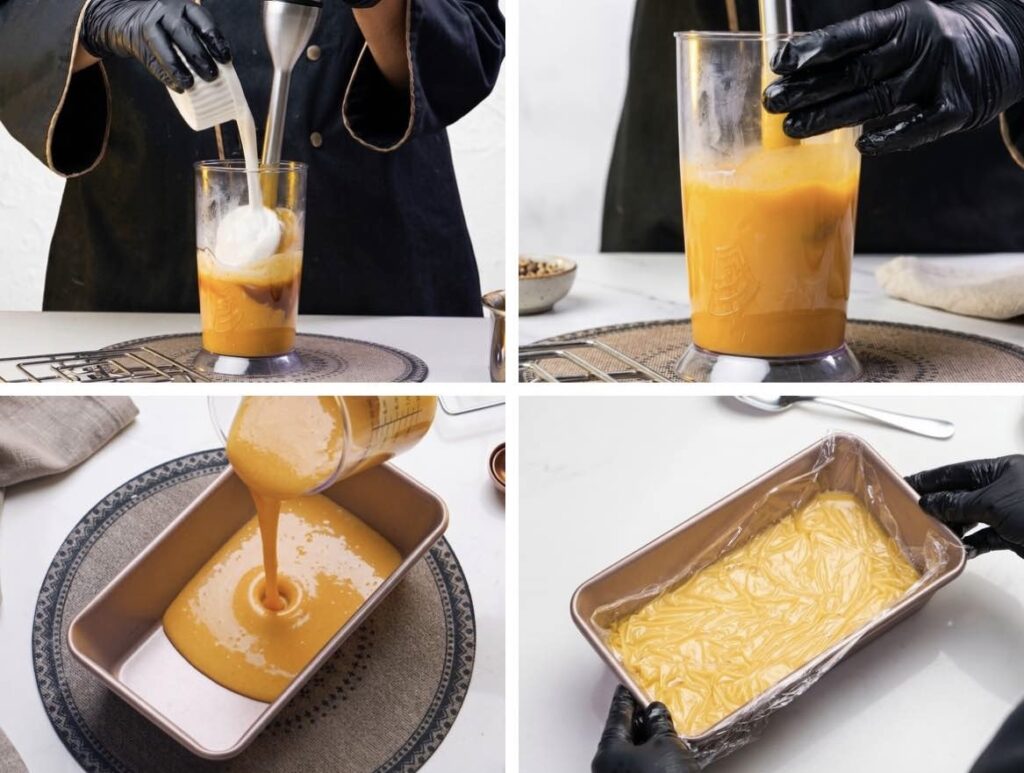
Step 4: Make the Salted Caramel Ganache
Slowly add the first 100g of room temperature whipping cream to the caramel while stirring continuously. Be careful, as the mixture may bubble.Allow the caramel mixture to cool to 40–45°C.Add the salt and mix well.Pour the warm caramel mixture over the white chocolate. Use an immersion blender to blend everything until smooth and glossy.

Step 5: Finish the Caramel Ganache
Add the remaining 100g of room-temperature whipping cream and blend again until the mixture is completely smooth and well combined.Cover the surface with cling film. Allow it to cool completely, then refrigerate overnight.
Phase 2: Bake the Chocolate Cake
Step 6: Mix the Dry Ingredients
In a large bowl, add the flour, sugar, cocoa powder, baking powder, baking soda, and salt.Whisk everything together until evenly mixed.

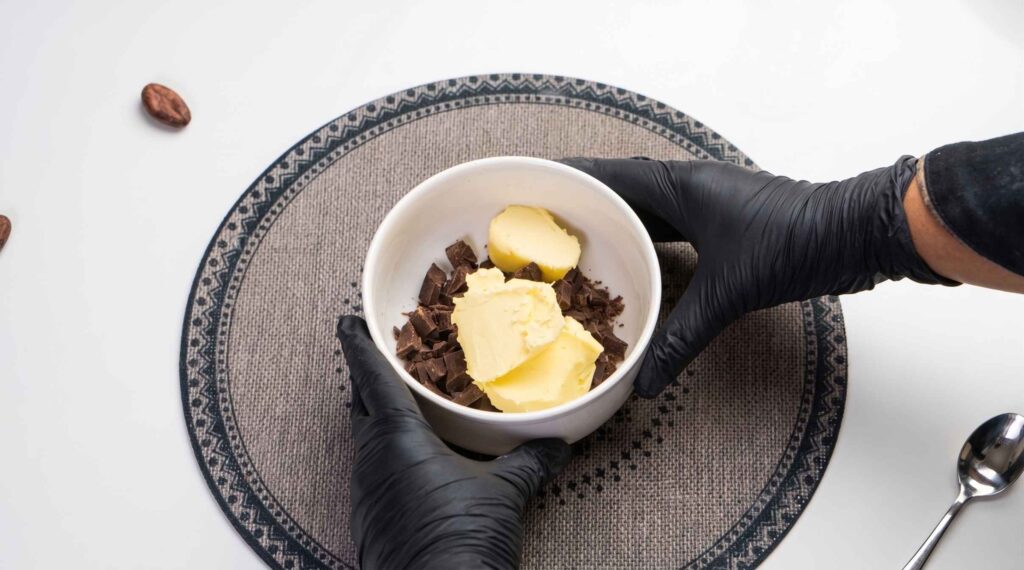
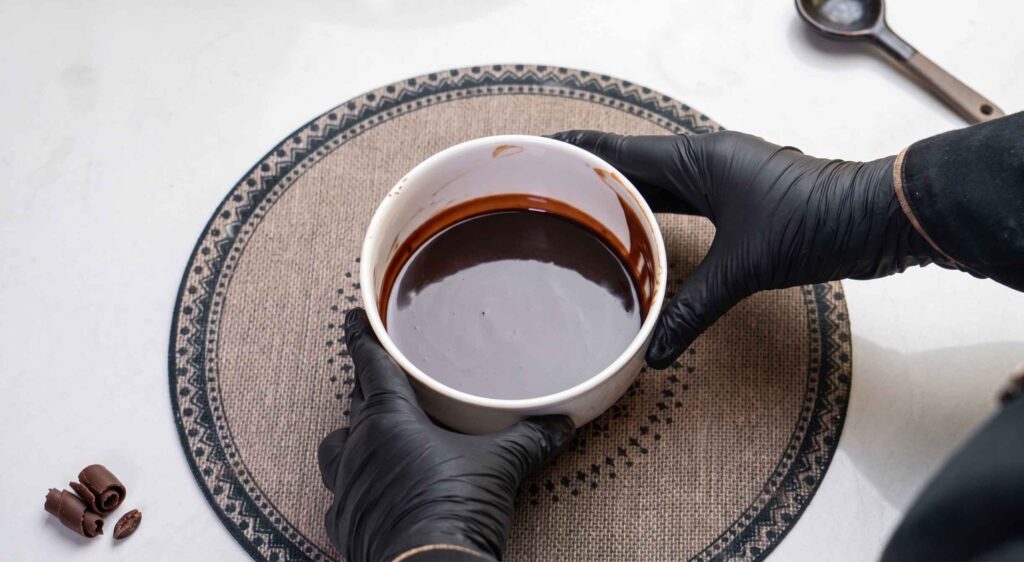
Step 7: Melt the Chocolate and Butter
Melt the butter or margarine together with the dark chocolate.Set the mixture aside and allow it to cool until it is just warm to the touch.
Step 8: Mix the Wet Ingredients
In another bowl, whisk together the egg, yogurt, and vanilla until smooth.Add the melted chocolate and butter mixture and whisk until everything is well combined.
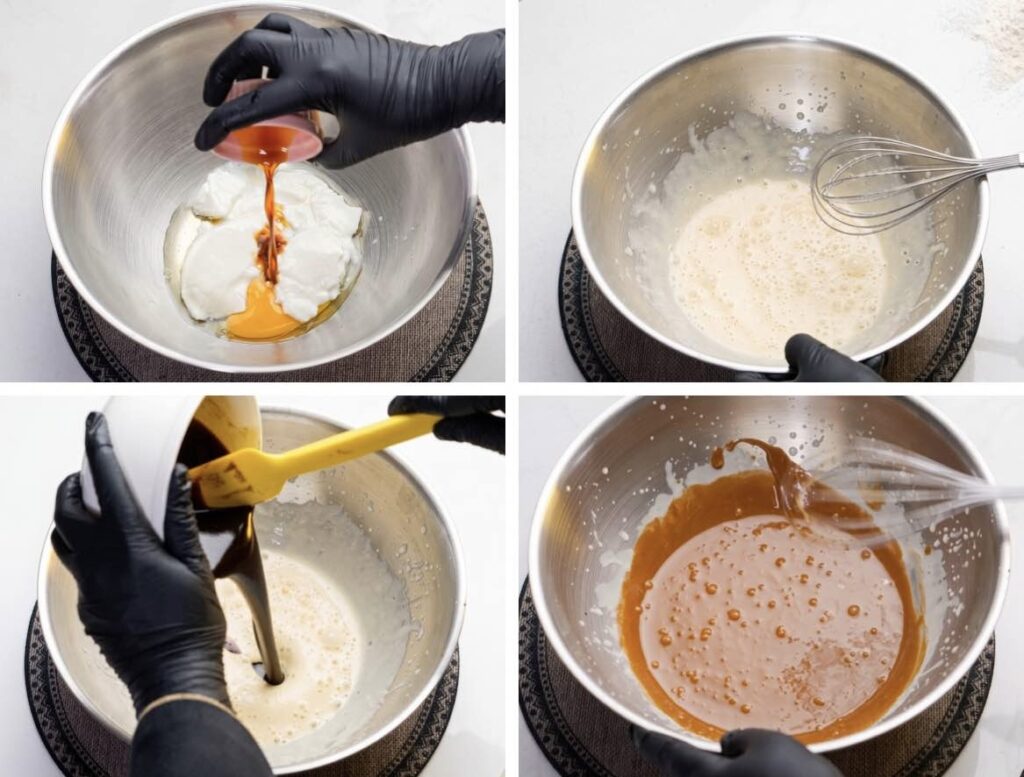
Step 9: Make the Cake Batter
Add the dry ingredients to the wet mixture.Mix gently until the ingredients are almost combined.Pour in the hot coffee and gently mix until you have a smooth, glossy batter.

Step 10: Bake the Cake
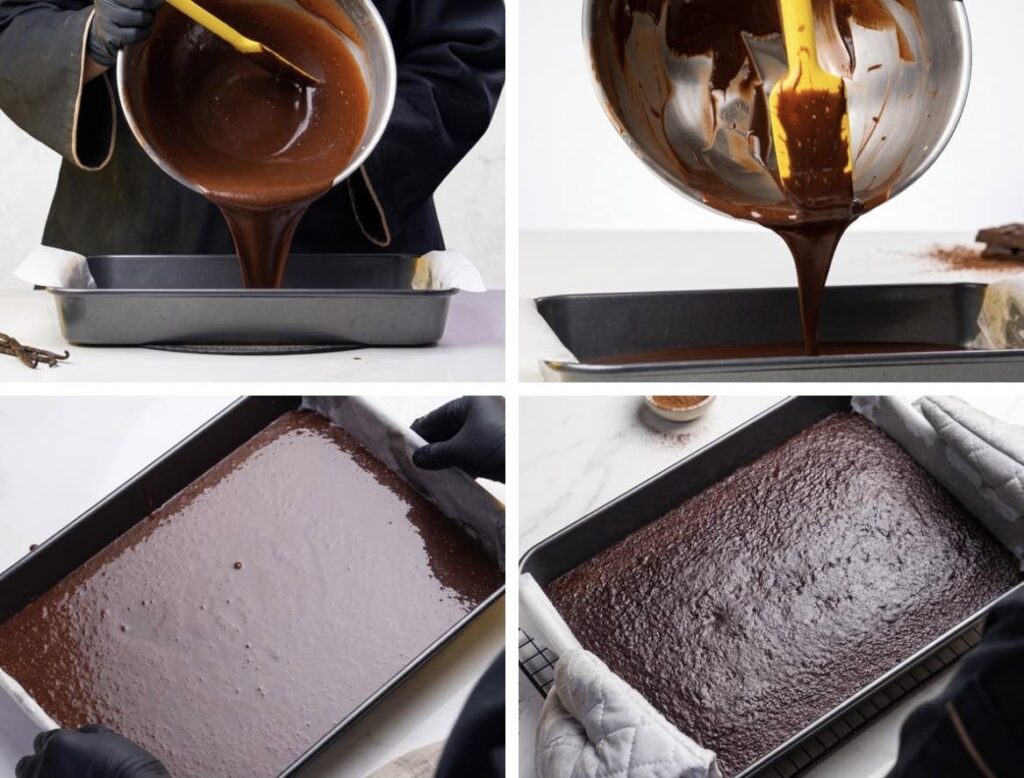
Pour the batter into the prepared baking tray and spread it evenly. Bake at the required temperature for 20–25 minutes, or until the cake springs back lightly when touched and a skewer inserted into the center comes out with a few moist crumbs.Let the cake cool in the tray for 10–15 minutes.Then transfer it to a wire rack and allow it to cool completely before assembling.
Phase 3: Assemble the Cake
Step 11: Whip the Caramel Ganache
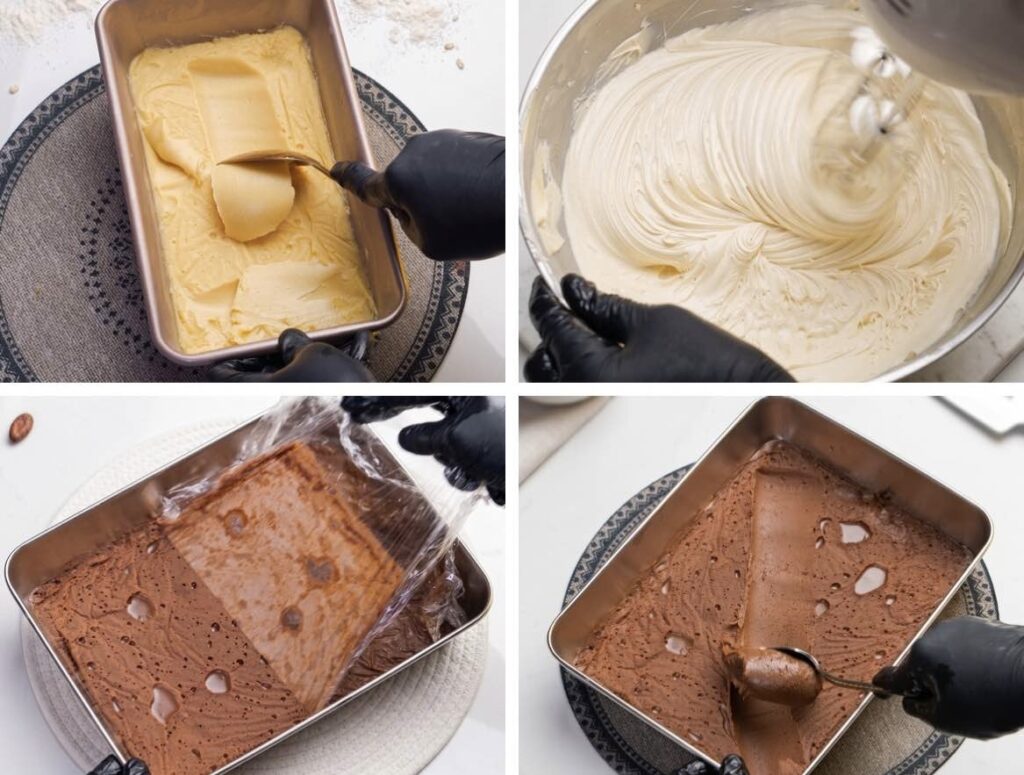
Take the chilled salted caramel ganache from the refrigerator and remove the cling film.Place it in a bowl and beat with a hand mixer on medium speed until it becomes thick and spreadable.”Do not over whip it.”Take the chilled chocolate ganache from the refrigerator, remove the cling film, and let it sit at room temperature until it becomes soft enough to spread.
Step 12: Prepare the Loaf Pan and Add the First Cake Layer
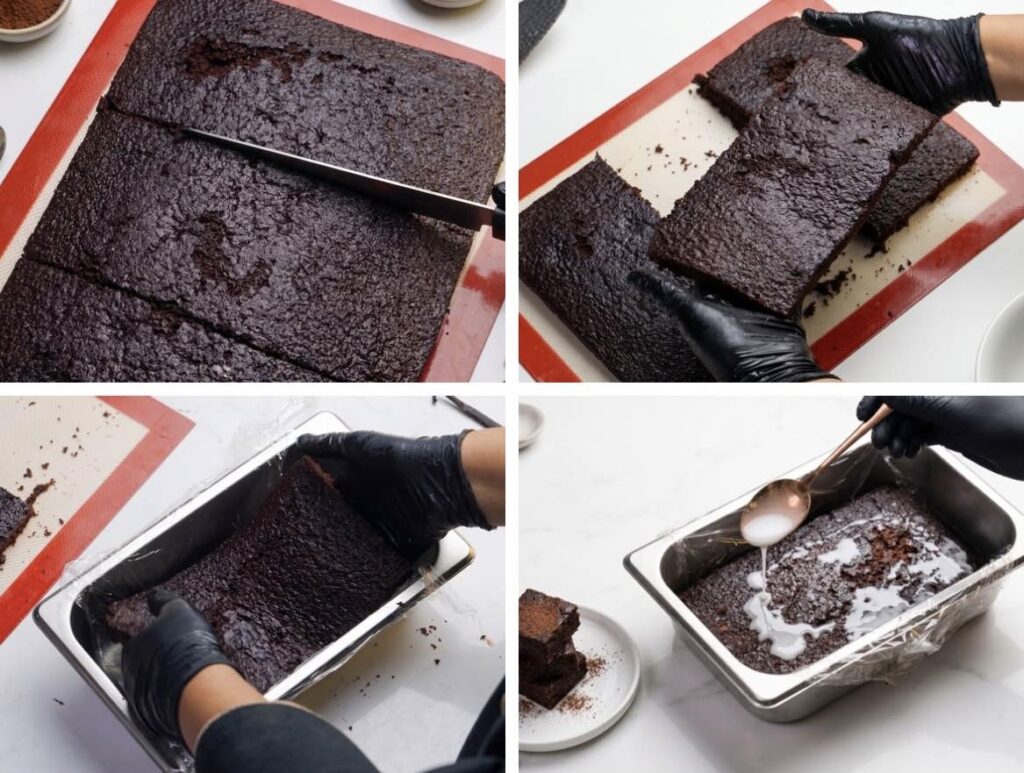
Line a 4½ × 8½-inch loaf pan with cling film, leaving plenty of cling film hanging over the sides.Cut the cooled cake into three equal pieces that fit inside the loaf pan.Place the first cake layer into the pan.Lightly spoon a small amount of milk over the cake to keep it moist.
Step 13: Add the First Ganache Layers
Spread an even layer of the softened chocolate ganache over the cakeThen spread an even layer of the whipped salted caramel ganache over the chocolate ganache.Try to spread both layers evenly so the finished cake has neat layers.
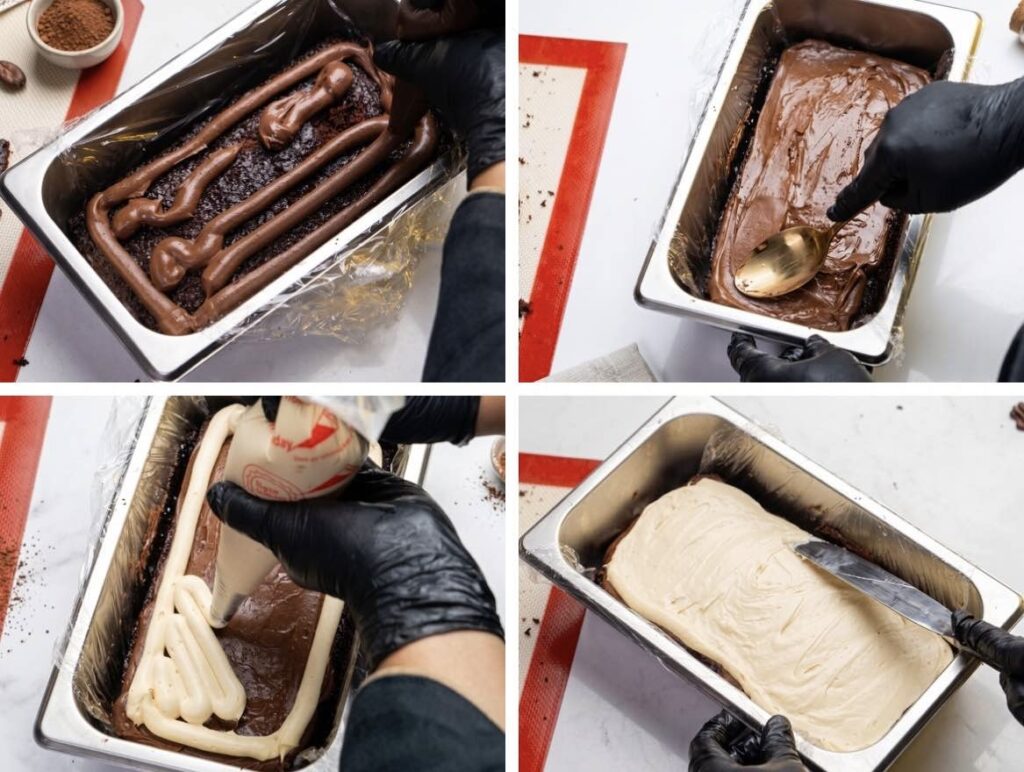
Step 14: Add the Second Cake Layer
Place the second cake layer on top of the ganache.Lightly soak it with milk.Repeat the same layers:
- Chocolate ganache
- Whipped salted caramel ganache
Spread each layer evenly before adding the next one.
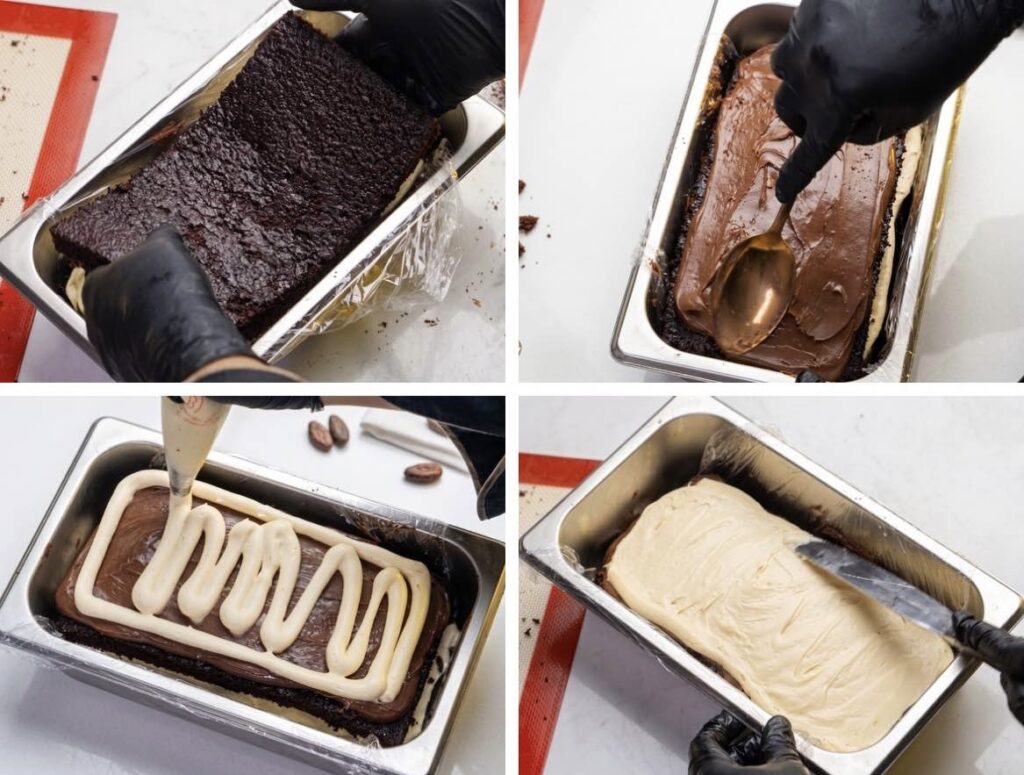
Step 15: Add the Final Cake Layer and Chill
Place the final cake layer on top.Lightly spoon some milk over the cake.Fold the overhanging cling film over the top of the cake, covering it completely.Refrigerate for 1–2 hours, or until the cake becomes firm.

Step 16: Add the Final Chocolate Coating
Take the chilled cake out of the refrigerator and carefully remove the cling film.Cover the entire outside of the cake with the remaining chocolate ganache.Use an offset spatula to smooth the top and sides.Refrigerate for another 30–60 minutes, or until the ganache has set.
Once firm, slice the cake and serve.

Other Recipes You Might Enjoy
If you enjoyed this rich chocolate and caramel cake, here are a few more recipes you might like:
Print
Viral London Chocolate Cake | Moist Chocolate Caramel Cake
Viral London Chocolate Cake🍫✨ A rich chocolate sponge layered with fluffy whipped salted caramel ganache and smooth chocolate ganache. A delicious bakery-style treat to make at home and save for your next baking day!
- Total Time: 11 hours 10 mins
Ingredients
🍫 Chocolate Cake
- All-purpose flour: 130g
- Sugar: 200g
- Unsweetened cocoa powder: 25g
- Baking powder: ½ tsp
- Baking soda: 1 tsp
- Salt: ¼ tsp
- Egg: 1 large
- Curd/Yogurt: 100g
- Vanilla: 1 tsp
- Butter or Margarine: 50g
- Dark chocolate: 50g
- Hot coffee: 100ml
🧂 Whipped Salted Caramel Ganache
- Sugar: 130g
- Butter: 80g
- Salt: ¼ tsp
- Whipping cream (room temperature): 100g
- White chocolate: 120g
- Whipping cream (room temperature): 100g
🍫 Chocolate Ganache
- Dark chocolate: 200g
- Milk chocolate: 100g
- Whipping cream: 230g
- Butter: 20g
Instructions
1. Make the Chocolate Ganache
- Melt the dark and milk chocolate. Add hot whipping cream and blend until smooth. Cover and refrigerate overnight.
2. Make the Caramel Ganache
- Caramelize the sugar, add butter, then gradually stir in 100 g cream. Cool slightly, add salt, and pour over the white chocolate. Blend until smooth.
3. Finish the Caramel Ganache
- Blend in the remaining 100 g cream. Cover and refrigerate overnight. Before assembling, whip gently until light and spreadable.
4. Make the Cake Batter
- Mix the dry ingredients in one bowl and the wet ingredients in another. Combine gently.
5. Bake the Cake
- Add the hot coffee and mix until smooth. Bake for 20–25 minutes. Cool completely and cut into three equal rectangles.
6. Prepare for Assembly
- Let the chocolate ganache sit at room temperature until soft enough to spread.
7. Layer the Cake
- Line a 4½ × 8½-inch loaf pan with cling film. Add the first cake layer and lightly brush with milk.
8. Add the Fillings
- Spread chocolate ganache over the cake, followed by whipped salted caramel ganache.
9. Repeat the Layers
- Add the second cake layer, milk soak, chocolate ganache, and caramel ganache. Top with the final cake layer and lightly soak with milk.
10. Chill & Finish
- Cover with cling film and chill for 1–2 hours. Unmould, coat with the remaining chocolate ganache, and chill for another 30–60 minutes. Slice and serve.
Notes
Tips and Tricks at a Glance
☕Add the hot coffee last to bring out that rich chocolate flavor.
🥣Mix gently once the dry ingredients are added.
🌀Keep the immersion blender submerged for a smooth, bubble-free ganache.
⏲️Chill the ganaches well before using or whipping them.
🧊Chill the assembled cake before adding the final ganache.
🧈Use room-temperature ingredients for a smooth, even batter.
⚖️Sift the flour and cocoa powder to keep the batter smooth and lump-free.
Notes:
- Storage: Keep any leftover cake in an airtight container in the refrigerator. It will keep well for up to 4 days.
- Before Serving: I like to take a slice out of the fridge and let it sit for about 15–20 minutes before eating. It softens slightly and tastes much better this way.
- Leave Extra Cling Film: When lining your loaf pan, leave plenty of cling film hanging over the sides. You’ll need this extra film to wrap the whole cake securely before chilling.
- Go Easy on the Milk Soak: A little milk soak is enough for each sponge layer. You want the cake to be moist, but not so wet that it becomes soggy.
- Prep Time: 45 mins
- Chill time: 10 hours (overnight resting + final setting)
- Cook Time: 25-30 mins
My Tips for Making the Perfect Cake
These are a few little things I learned while making this cake that can really help. Nothing complicated—just simple tips that make the whole process easier and give you a better result.
- Let Your Ingredients Come to Room Temperature: Take the eggs, yogurt, and butter out of the fridge before you start. When everything is at room temperature, the ingredients come together much more smoothly and the batter bakes more evenly.
- Add the Hot Coffee Last: I like to add the hot coffee right at the end when making the chocolate batter. It helps bring out the cocoa flavor and gives the cake a deeper, richer chocolate taste.
- Be Gentle With the Batter: Once the flour and other dry ingredients go in, mix only until everything comes together. There is no need to keep mixing. Overmixing can make the cake heavier instead of light and tender.
- Keep the Blender Under the Ganache: When blending the caramel or chocolate ganache, keep the immersion blender fully submerged. This simple step helps prevent air bubbles and gives you that lovely smooth ganache.
- Chill the Cake Before Frosting: Once the loaf is assembled, wrap it well and chill it until firm. I find this makes frosting much easier and helps you get those nice, clean edges.
- Give the Cake Time to Rest: If you can wait until the next day, I definitely recommend it! The chocolate and salted caramel flavors have more time to come together, and somehow the cake tastes even better the next day.
- Keep an Eye on the Caramel: Caramel can change very quickly, so don’t walk away while the sugar is cooking. Once it reaches a medium amber color, turn off the heat before adding the butter and cream.
- Don’t Overwhip the Salted Caramel Ganache: Once the ganache is nicely chilled, whip it just until it becomes thick, smooth, and easy to spread. As soon as it holds its shape, stop whipping. Overwhipping can make it split or curdle.